
Dillon XL 650 Progressive Reloading Press
A fair warning before you start diving in to this review: It’s going to be comprehensive. There are so many stages to reloading, especially with progressive presses, that there is just no easy way to give out meaningful information without practically writing a book. So if you have the time, sit back and read, because in my opinion, choosing a press is certainly the most important factor in reloading.
If you are looking into getting a progressive press and do not have any reloading experience, it is this writer’s opinion that you start out on at the very least a Turret press, or even a single stage. There are so many things to learn and understand when you first get into reloading, I feel that you can easily get distracted by everything that’s going on when using a progressive press: It complicates the learning process, and is potentially dangerous if you don’t know what you’re doing. Focusing on 1 stage at a time is much better to start out on. Having said that, if you are dead set on progressive, or maybe looking to upgrade, read on.
The Dillon XL 650 Reloading Press is a 5 stage progressive press, meaning that every time you push the arm down and pull it back up, you are completing up to 5 stages at once….that is the essence of progressive presses: Multiple completion of steps for every pull. Dillon, recognized for their signature blue colored presses, and is highly respected in the reloading community. To be sure, they are definitely nice, high quality presses. But Dillon is not without its’ caveats. To be clear, EVERY press has quirks and issues, just as every shooter that reloads has their preferences. I definitely have mine, and will attempt to identify them in this review so that you are clear on what I identify is a preference vs a caveat.
I’ll start off with stating the configuration that I purchased: I opted for the XL 650 press (obvious) with two quick caliber change kits, a casefeeder with all 4 case size plates (small pistol, large pistol, small rifle, large rifle), a small and large primer quick change system, shell holders for 45 ACP, .308 and 5.56, and a roller handle. Since my initial purchase, I have added calibers and quick change kits…..the only reason I say all this is because your initial purchase can save you quite a bit of heartache and future confusion. I will admit: I was REALLY confused as to what to purchase. Without knowing up front what does what, it was impossible to get the perfect configuration the first time. While you can purchase directly from Dillon Precision, I recommend buying from Brian Enos because they bundle quite a few options together to make the purchase process simpler (even then, it’s still confusing). I emailed and called them and explained what I wanted and they were very helpful in explaining how it all came together. Suffice it to say, all the options make life easier, and your situation will determine which options you NEED and which options would be nice. Some notes:
- Quick Change Kit: Includes toolhead (die plate), toolhead holder and powder measure
- Quick Change Primer System: A complete primer dispenser allows you to skip the disassembly of the primer wheel to switch for small and large primers (faster).
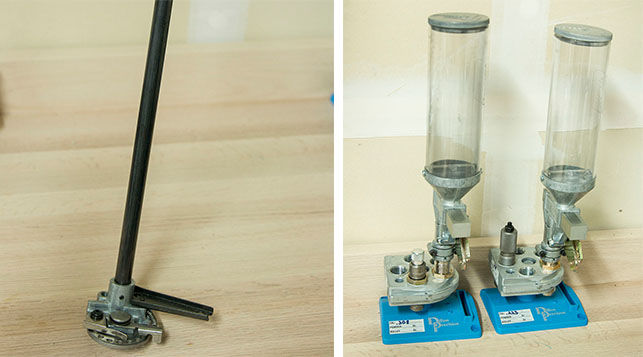
Dillon XL 650 Quick Change Kits
Progressive loading is really meant for bulk loading lots of ammo at one time, and in my opinion, the Dillon XL 650 is no exception. Even with all the quick change kits and available to make the caliber switch as easy as possible, it takes about 30 minutes to switch everything up. It would many times longer if I didn’t have the Quick Change options. Here’s the short list of items that need changing (utilizing quick change kits):
- Casefeeder Plate
- Casefeeder Adapter
- Casefeed Arm Bushing
- Body Bushing
- Primer Punch/Seater
- Shell Holder
- Primer dispenser
- Toolhead/die holder
- Shellholder locator pins
- Switch Cam Position (if going from pistol to rifle, or vise versa)
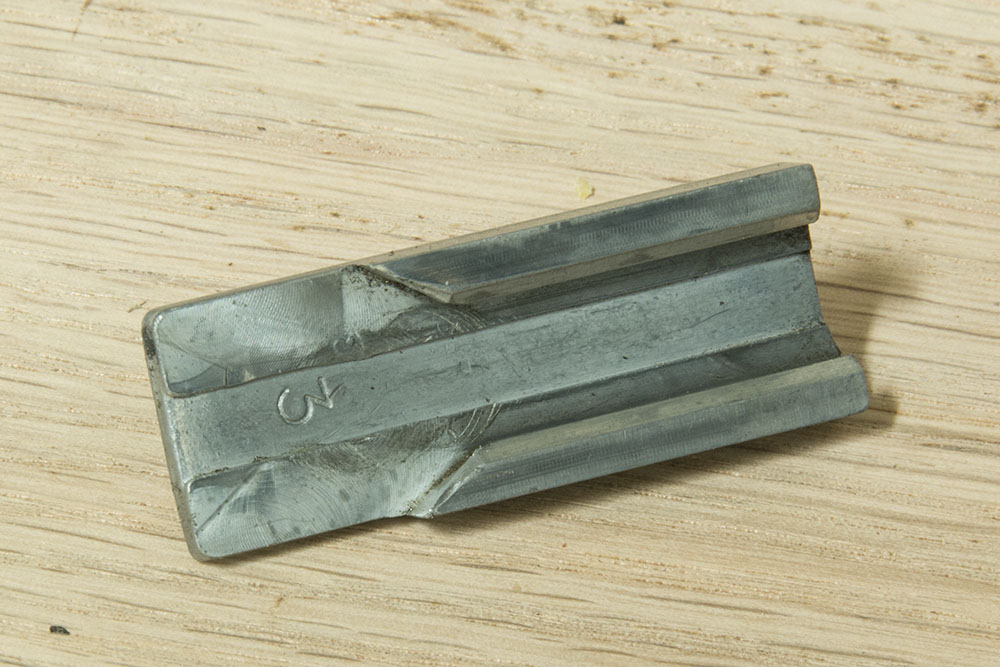
- Station 1 aluminum slide
In addition to changing these quick change items out, some of them may need adjusting. You can see why it takes a while to change calibers. So take it from me, if you are constantly switching calibers without bulk loading, I dont believe this is the press for you….there’s just too many steps and adjustments to change to make it worthwhile.
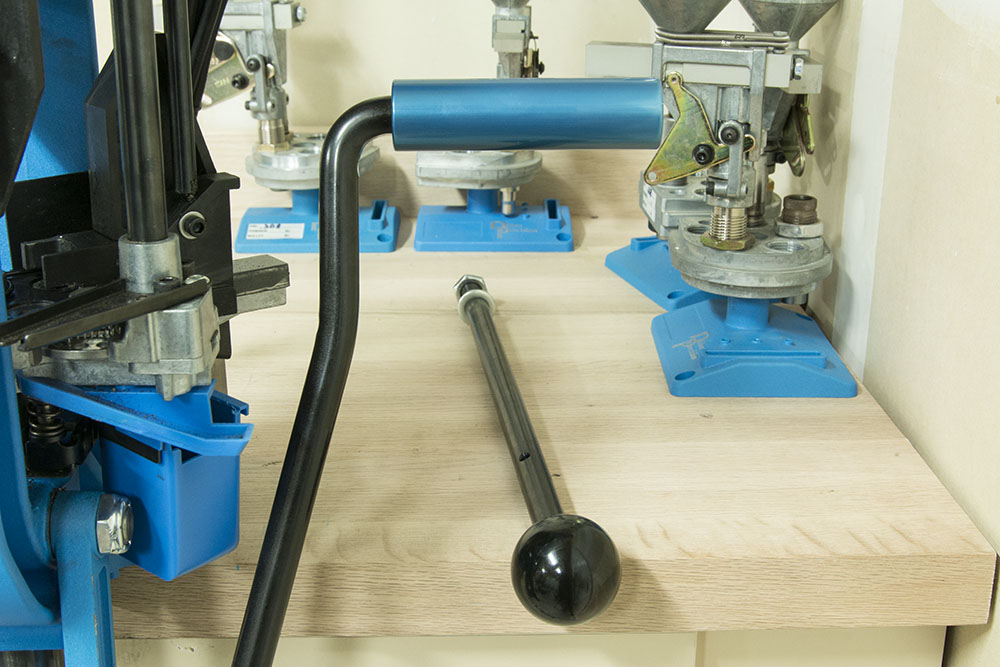
Initial installation of the press body is pretty straightforward: Bolt it down to something strong and unyielding. A heavy cabinet and thick benchtop will do. I placed mine on a custom 40″ cabinets (including toe kick) and a 1.5″ oak butcher-block top. If there was an earthquake, being inside one of these cabinets is the safest place in my house! Anyway, I couldn’t find the following measurements ANYWHERE on the net for what type of bench space was required. The following should prove useful for you in knowing how your bench needs to be set up prior to purchase. You will need:
- 1″ of benchtop overhang from the face of the cabinet is MANDATORY to clear the press linkage. This is how far in the linkage goes behind the edge of the benchtop.
- 6.5″ of clearance from the flat underside of the press (the part that sits on the surface of the benchtop) to whatever is underneath (cabinet door, possibly benchtop, anything). This is how far the ram and linkage hang down when completely extended.
- You will need to cut down or get exactly to size the front-right bolt that will bolt the press to the benchtop. From the top of the base of the press (underside of the bolt head), to the bottom of the bolt, you have a MAXIMUM of 2-9/16″ before the ram linkage will hit the screw. I used a Dremel to cut/grind it off.
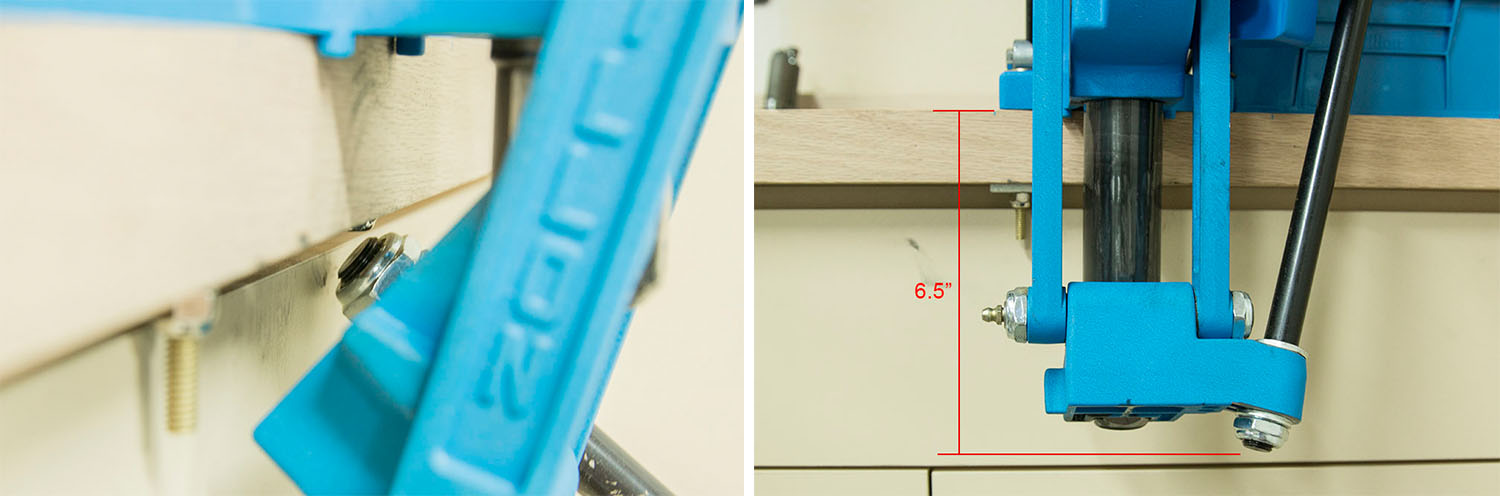
Benchtop Clearance
Note: These dimensions assume you are NOT using the Dillon press mount to mount on top of a much shorter bench.
Once you have the press set up for the caliber you are reloading for, you need to adjust the dies in the toolhead. You have to set up each station individually. Here’s how I have mine set up:
- The first station for me is empty: I opt not to de-prime and re-size in the reloading process and do this before cleaning the brass.
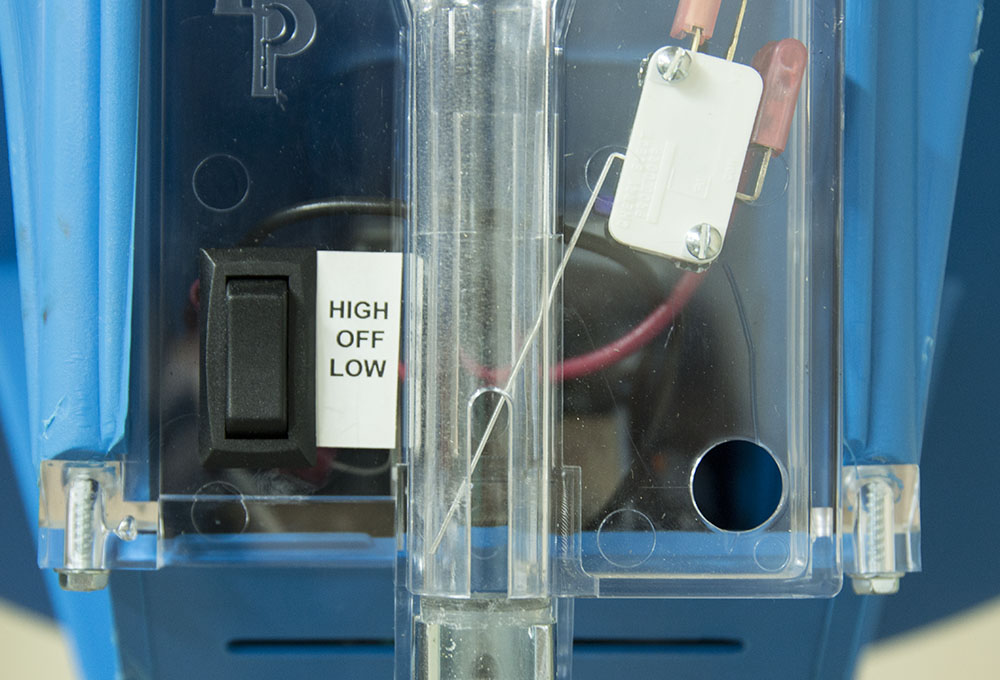
- Station 2 is the priming and charging station (these cannot be moved to a different station). There is no adjustment for priming other than changing it from small primer to large primer (only one or the other comes with the press….you have to either buy the other primer size dispensing wheel, or buy the quick change primer system). The powder measure must be adjusted for the powder being used. If you always use the same powder and charge for the caliber being reloaded, you generally don’t have to mess with this after the first time. But it is a good idea to weigh a test charge to make sure you’re dropping the right amount of powder.
- The third stage is typically the bullet seating stage, which must be adjusted the first time, and any time you change projectiles.
- The fourth stage is typically a crimping stage, which will need to be adjusted based on the length of your brass (hopefully it is all uniform length, right????).
- The final stage I have open and no need for it. But given that I have two empty stations, I’m not sure what would need to go there. But it’s there if you need it. For people who trim their cases to length with the Dillon trimmer and die, this can be incorporated into the reloading process without issue and can save quite a bit of time (I have not incorporated the Dillon trimmer into my reloading process, so I have no opinion formed of how well it works).
So now that you have your dies set up to the proper length and powder amount, charge up your primer tube, dump some processed brass into the casefeeder and turn it on and it will start dropping brass for you, get your bullets to the side, and you’re ready to reload!
The Dillon XL 650 Reloading Press loads clock-wise and has station 1 set at the 2 o’clock position. This is one of 2 reasons why I can’t recommend the casefeeder enough…..manually inserting cases into station 1 requires you to reach around to the back of the press to insert it. It’s awkward and time consuming.
Now, after you drop the primers into the tube, they don’t automatically time up with the cases that are falling from the case feeder. So while the first case hits position 2 on the second push and pull of the press activation arm, the first primer won’t hit position 2 until after the 8th pull. If you don’t manually correct for this before pulling the handle 8 times, you will end up with 6 charged cases that don’t have a primer and will be spilling powder everywhere and will have wasted powder and needless cleanup time. So what you’ll need to do is manually articulate the lever on the primer dispenser 6 times before you throw the main lever at all. If you do this 6 times first, then pull the main lever twice, the first case will match up with the first primer….and no spilled powder!
At this point, the press should be working like clockwork. The only thing you need to do is to put the bullet on top of the case at the 3rd station. Other than that, do a few spot checks here and there with the powder, watch to make sure you’re not running out of brass, check your primer count, and just keep moving that lever up and down. During this part, there are some noteworthy things I want to mention about the Dillon XL 650:
1) Depending on the caliber/case and how much of the volume of the case that the powder takes up, it can spill powder out the mouth when it snaps into the next stage as you pull the handle back up. The system is spring loaded, so while it indexes perfectly, it also snaps in place to get there, spilling powder as it snaps. So, there are a few fixes online that you can attempt to mitigate this “flaw”, but I have opted to do none. Instead, I use my finger to hold the base that was just charged and keep it from jerking around during the snapping process.
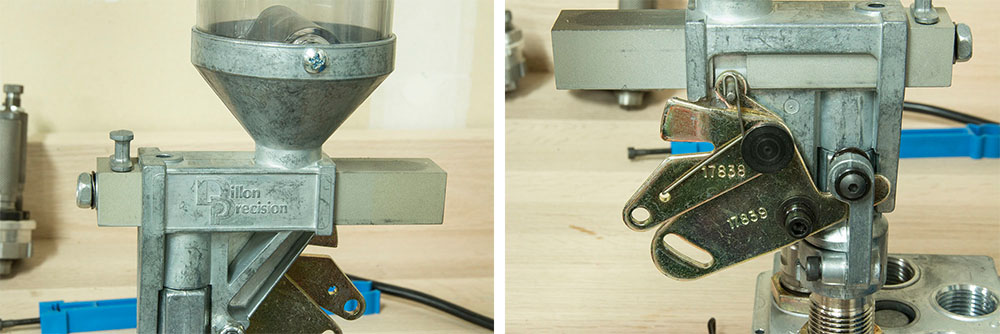
2) Make sure you set the cam in the right direction, otherwise it will activate the casefeed arm too early and the case will drop too early, causing the case to fall over and out of the aluminum slide.
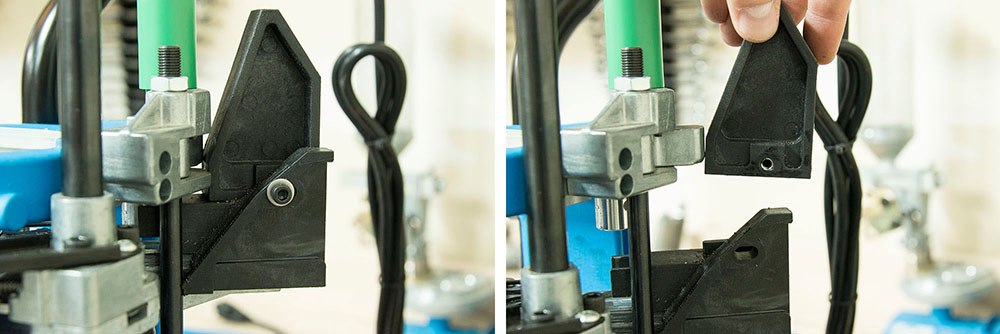
Flipping the Cam
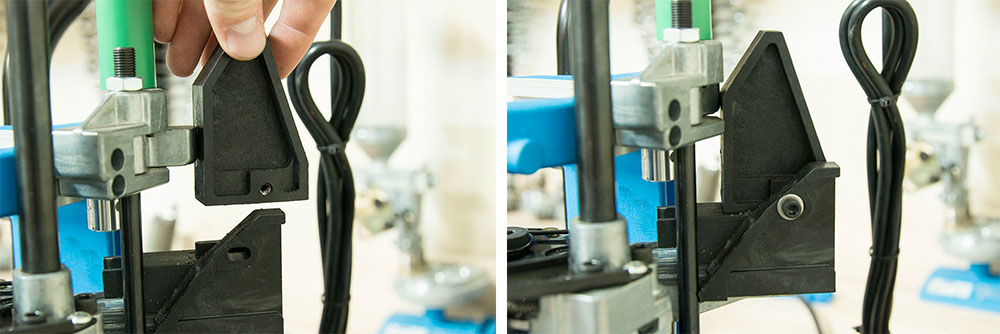
Reinstalling the Cam
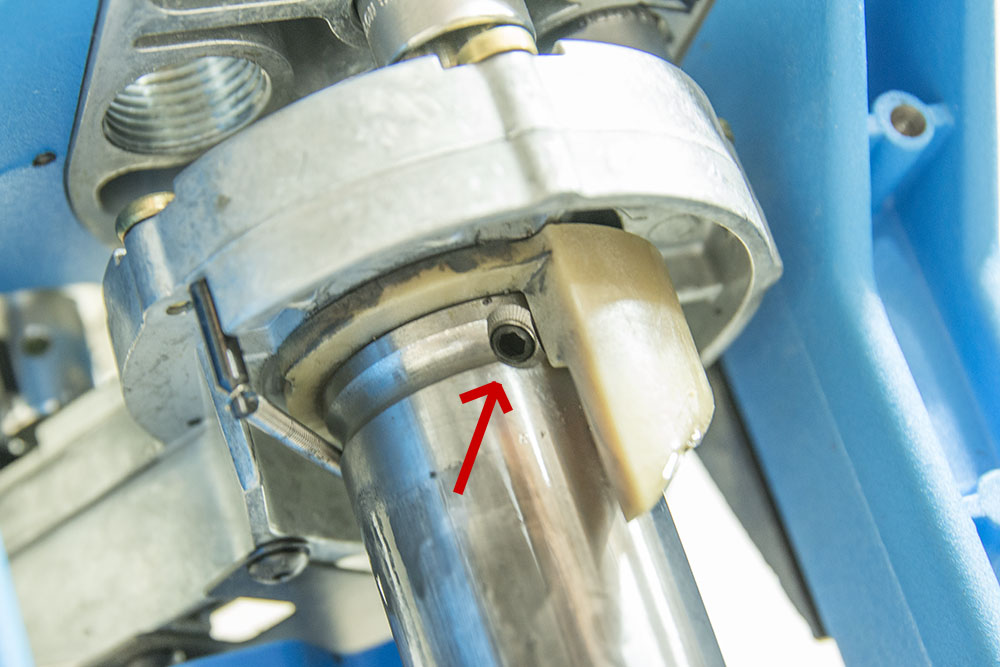
3) Make sure you tighten the set screw underneath the shellholder (at the top of the ram): If you don’t, you will find yourself constantly having to loosen the shellholder screw. Make sure to keep the shellholder screw (not set screw) somewhat loose so that the shellholder can spin freely, but not so loose that it allows up and down/side to side movement in the shellholder.
4) If something gets out of sequence or one of the steps goes wrong, just take it out and set it aside. It takes much longer to fix the problem and hold up the rest of production than it is to save it for later.
5) Sometimes there might be an upside-down case that goes down the shoot. There’s nothing you can do other than to let it fall out and pump the handle again. This will result in a lost station, which means a primer goes unused. The primer, when unused, will fall down a shute that is supposed to house all the unused primers, but they really have a hard time staying in the fall tray (it’s so small). So to help this, I fashioned some cardboard and tape to increase the wall height so I won’t have to scrounge the ground for the skipped primers.
6) I am not 100% thrilled with the way Dillon uses a metal rod that attaches to the metal bracket on primer dispenser to activate the powder drop release back into position for refill. If it’s not set up right, it sometimes fails to extend all the way down to its resting position, which means the charge bar will not fill up with powder all the way…..which means inconsistent and potentially dangerous loads. I have one Quick Change Kit that I purchased after my initial purchase (at a local retailer) that came with a spring assisted return for the charge bar, and I like it much better. I’m not sure which came first, but my guess is they switched the spring assisted model out for the multi-lever type, and I don’t like it.
New Style Powder Measure
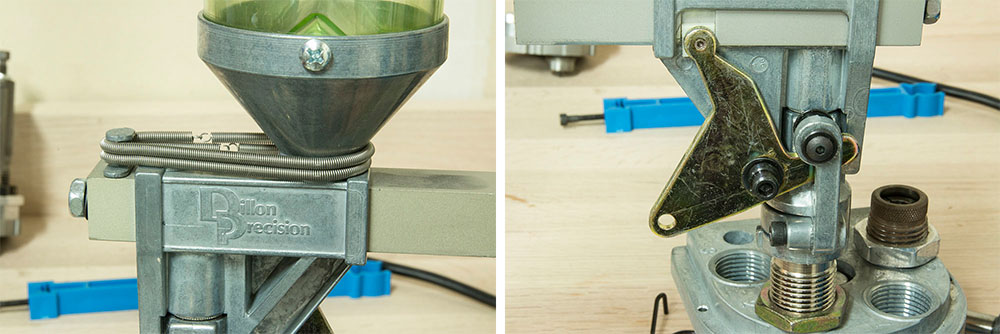
Old Style Powder Measure
7) I wish the aluminum stage slides came in stainless steel. If you’re not careful or are trying to go too fast, the brass can catch on the surface of the slide and will actually gouge the aluminum, making it so the slide is no longer smooth. Future brass will begin to hang up when moving through the slide into stage 1. A good polishing or new slide is in order when this happens. If you want to keep this from happening, DONT force the case into stage 1. If there is resistance, figure out why before you gouge it.
8) This may be more of a preference, but I found that compared to my Lee, this press has a hard time with even lightly crimped primer pockets. For some reason, there was much more forgiveness in the Lee press. You’ll want to make sure the crimped brass is removed before loading on this press. The Lee also has more “feeling” to it, where I could tell what was going on much more easily. With the Dillon XL 650, I have a much harder time deciphering if a primer is missing, if a primer is seating incorrectly, or if the primer pocket is too loose. Maybe it’s due to the linkage…..maybe it’s due to the heavier and bulkier ram and shellholder…..I dont know. But I wish it gave more “feeling feedback”.
9) The casefeeder works really well. For those of you considering trying to save some money, this is an area I would not skimp on. The whole point of buying a reloading press like this is to save time and pump up your throughput. A casefeeder will increase your speed realistically 4 fold over not having the casefeeder. For the relatively few times that it will throw an upside down case, you get hundreds that don’t. To aid in minimizing upside-down cases, it has a fast or slow switch. If you reload really fast, you might be able to beat this out, but unlikely without a bullet feeder (which I do not have). The casefeeder also has a lever that will stop the feeding action when the tube is full of cases to load.
.
10) The roller handle is one thing you certainly don’t “need”, and in fact I am not sure I am in love with it. It can squeak at times, and I find that for some reason the shape of it can actually hurt my hand over time. Then again, so can the standard ball lever. This is 100% a preferential issue and clearly, I dont even know which one I prefer. For now, I left the roller handle on the press.
.
11) Dillon powder measures have worked pretty well for me and work pretty much like any other powder measure. Like most powder measures, stick powders can have some variation, but for bulk ammo reloading, it’s no deal breaker. They work very well with ball powders.
12) If you happen to forget to fill your primer tube before you run out, and you’re not utilizing the buzzer that tells you you’re about to run out (I dont like the Dillon primer buzzer and would prefer to count instead, but the buzzer does work….more of a preference thing), then prepare for some powder clean-up. Fine powders are much worse than course powders. It gets all over the place underneath the shell plate and starts getting gritty when the shellplate indexes to the next station. You’ll want to take the shellholder plate off and blow/wipe the powder out.
At the end of the day, the Dillon XL 650 is really a great reloading press and can make rounds very efficiently once set up. My findings above are my experience and mine alone…..others may have a different experience with the 650 depending on their setup, based on the additional tools they do or do not utilize, etc. I think 2 people can have the same press and have completely different experiences with it. All I will say is that you should know the reasons that you’re looking to get a press like this. Here’s what this press is NOT intended to be:
- Fastest at switching calibers
- Good at in-process changes (all progressive loaders, really….not Dillon specific)
- Super-Accurate, high competition-grade quality
That last one might give you cause for concern, and many may balk and call me crazy. But I stand by it: This press is not for people who are intending to shoot the balls off of a squirrel from a 1000 yards, time after time. There’s simply too much “play” and “forgiveness” in progressive systems; too many moving parts to make that kind of ammo. If you want the highest quality, most accurate ammo, you are not using a powder measure to charge cases. You are not using a progressive press. You are not bulk/speed reloading. What you WOULD be doing is using a single stage press that has a much lower throughput capacity but a much higher accuracy level with less play. You would be using neck turners and concentricity gauges to manipulate/measure neck and bullet runout. You are using a highly accurate digital scale, measuring charges in the hundredths of a grain. You would sort your cases first by make and batch, then weigh each case and bullet individually. You might even be turning your own solid projectiles! If this is you, you probably already know that the Dillon XL 650 Reloading Press is simply not for you. Don’t get me wrong: You can make fine ammo with the XL 650, just not the kind that intense long range competitions demand.
This press was perfect for me, even with its caveats, because I was looking to save time in reloading and don’t require long range competition accuracy. Before I purchased the Dillon XL 650, I solely used a Lee Classic Turret press without the indexer. Sure it was faster than a single stage, but I lost the accuracy of a single stage and didn’t have the speed of a full progressive. For every 1 bullet I made on the Lee, I can make 3-4 on the Dillon! That is a 300-400% increase!
When all is said and done, Dillon makes a great product that I definitely recommend to people looking to increase their reloading efficiency. I value my time heavily, because it is the ONE THING in life that I can never get back. But again, I don’t recommend this for someone new to reloading…..or any other press for that matter!
The Dillon XL 650 Reloading Press helps me get more time without sacrificing my round output. If you’re looking to do the same, I highly suggest going with a progressive press, and the Dillon XL 650 should be towards the top of your list of options.
Hey Admin, Thanks for sharing such a great article it’s really informative and helpful. I personally use this press and for me Dillon XL 650 is the best Progressive Reloading Press.
Thanks Thomas! I appreciate the feedback.
Really appreciate real world feedback on equipment without the shakey, unfocused video shot by someone more interested in showcasing their setup than passing on relevant info. Just bought one of these after 30+ years with an RCBS Piggyback. Lot of difference and no the Dillon isn’t perfect. I probably wouldn’t have considered primer indexing at the start. Excellent article, thank you for sharing.
Thanks for the feedback Bob! Yes, there is no perfect system. A lot of reloading, I am finding, is user preference. Do you like die plates, or collects for individual dies? Do you like clock-wise or counter clock-wise rotation? Do you like Red or Blue? Lot’s of different options out there to suit everyone’s preference. But perfection has yet to be found.
Thank you for this very thorough article. I am in the process of moving to a Dillon XKL 650 and appreciate your experiences. The setup look complicated but will certainly save me a lot of time reloading. Thanks for taking the time to share your thoughts with us.
Hi,Admin
It’s a nice post.You describe the article with pictures it’s very good us .So I understand easily Dillon XL 650 it is the best.Thanks for sharing.
Great write up! I’m looking at a used 650XL to add to my RCBS single, Lee Turret and LoadMaster my favorite so far a Hornady LNL AP. They all have their own quirks and I enjoy your honest observation of the 650 XL.
Thank you for your time,
CA
I have noticed you don’t monetize your website, don’t waste your traffic, you can earn extra bucks every month because you’ve got hi quality
content. If you want to know how to make extra bucks, search for: Mertiso’s tips
best adsense alternative
I have checked your blog and i’ve found some duplicate content, that’s why you don’t
rank high in google, but there is a tool that can help you to create 100% unique content,
search for: boorfe’s tips unlimited content
I often visit your website and have noticed that you don’t update it often. More frequent updates will give
your site higher rank & authority in google. I know that writing articles takes a lot of time, but you can always help yourself with
miftolo’s tools which will shorten the time of creating an article to
a few seconds.
I Love to read your article. Because you shared your experience, it’s helped me to know Reloading Press
Hi! I am looking for this awesome press but I need to get the envelope dimensions (HxWxL), with all the accessories mounted. The case feeder makes it higher and wider with both bullet and reloaded ammo baskets.
thanks and congratulations for the excellent article!
Nice article. So great information! I think it is one of the best Progressive Reloading Press on the market. Very nice Dillon XL 650 Review, thanks!
This is one of the best progressive reloading press i ever use.