Seekins Precision / Spikes Tactical SAR Rail
Intoduction to SAR Rail:
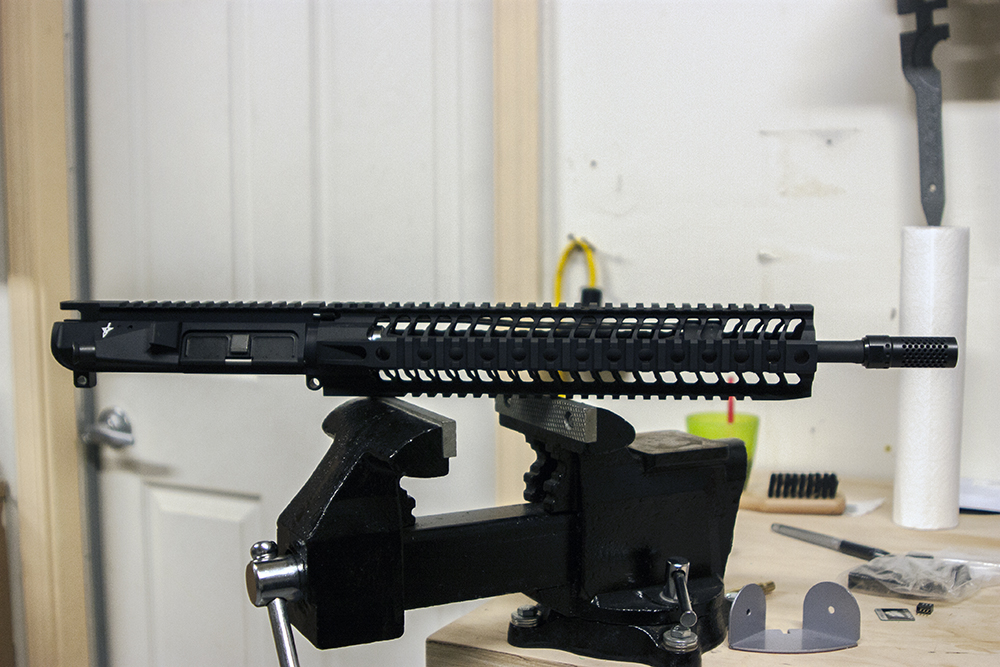
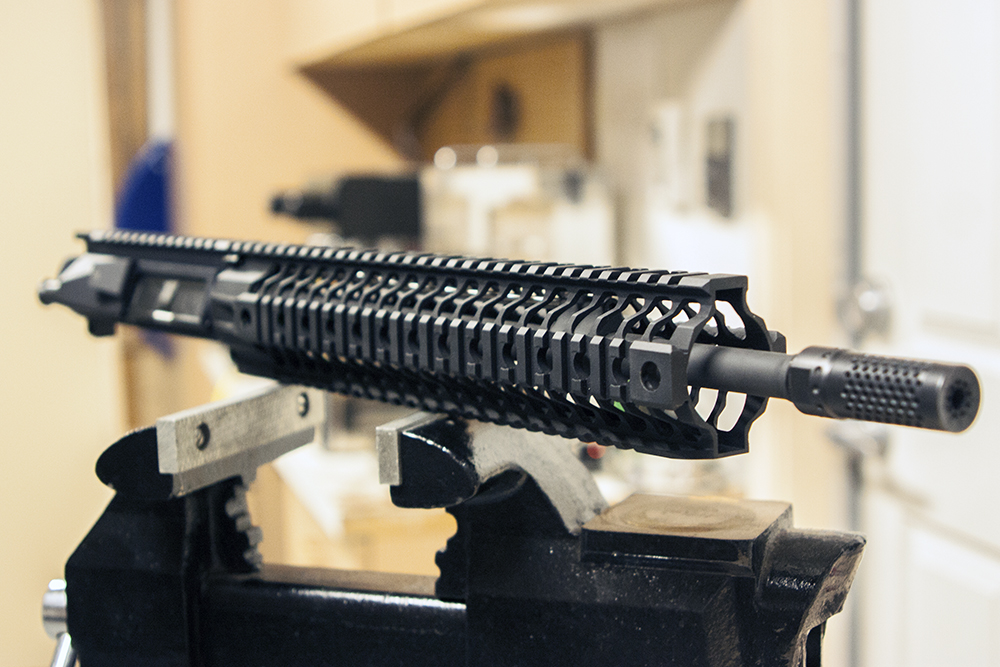
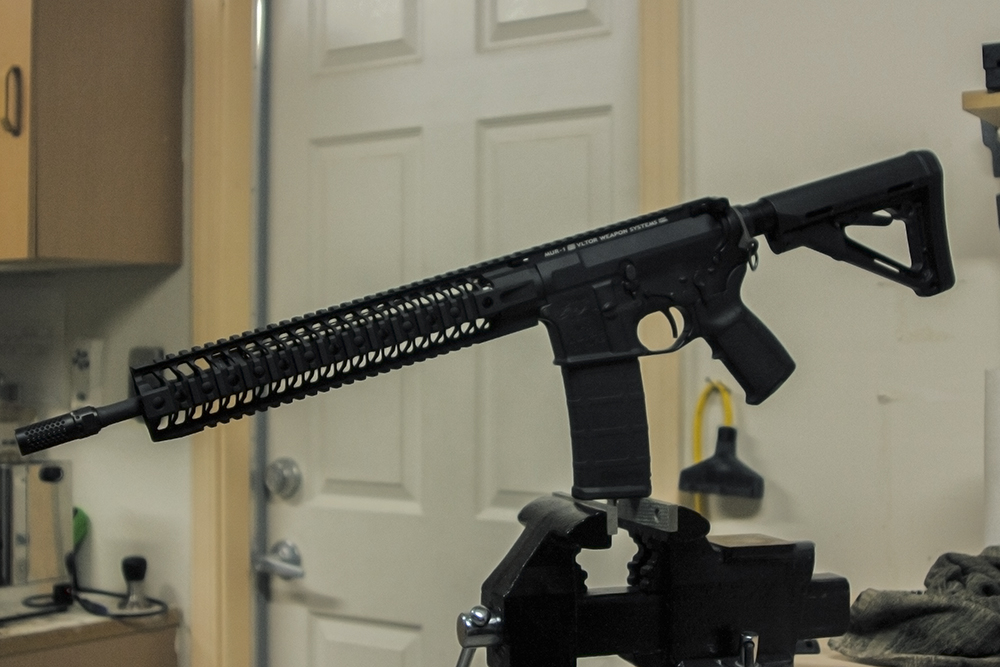
The Seekins Precision / Spikes Tactical SAR Rail represents the latest in the AR-15 rail craze. People have been asking for lighter, yet stronger rails that are also appealing to the eye. I this case, I believe the SAR rail fits the bill very nicely. The rail is made by Seekins Precision, who also either makes or licenses out the design to Spikes Tactical (albeit with one slight difference). Seekins, a lesser known name in the firearm community, is slightly cheaper than the Spikes variant. They have different lengths and also two different styles: SAR or BAR. The BAR is a wider, circular version, where the SAR is a thinner and slightly lighter version. I dont like really wide handguards or rails, so I opted for the SAR model.

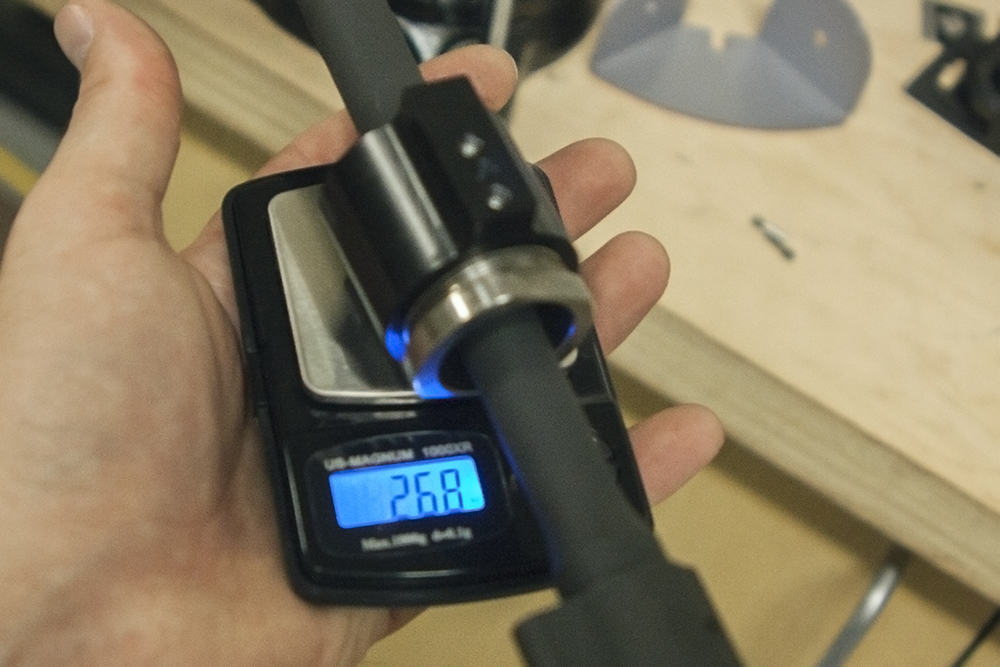
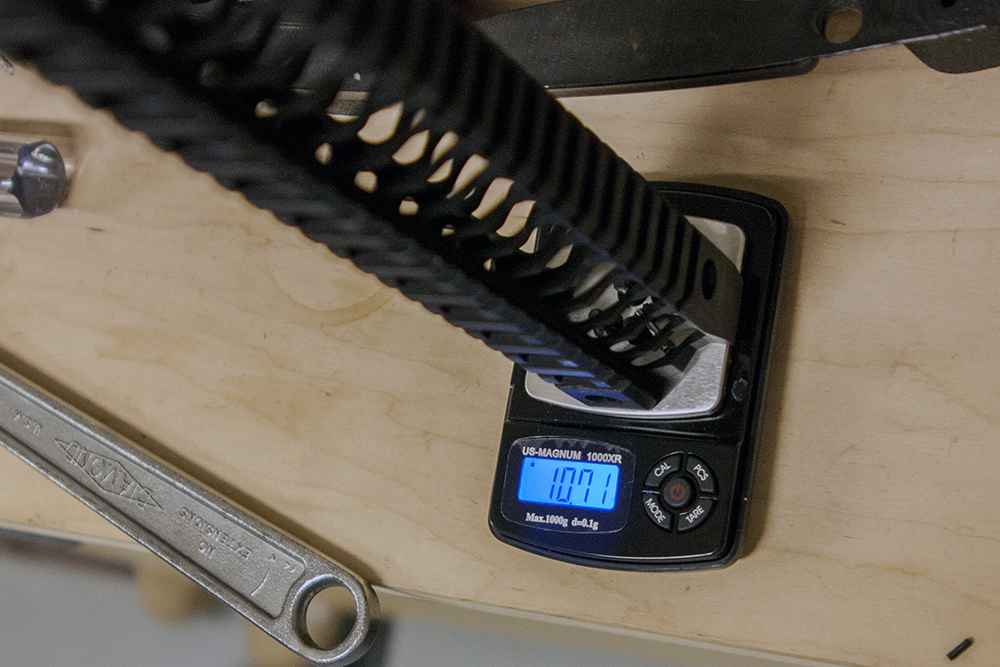
One thing I noticed immediately was how light this thing really was. It was amazing! Coming from a really heavy rail, I wasn’t prepared to have such a long rail feel so light. The two pictures below show total weight….screws, barrel nut and all (measured in ounces). The combined weight equals 13.39oz.
The model rail I choice was the 12″, which actually measures 12.5″. Certainly not a problem for me. My barrel is a midlength barrel, and I have a low profile Daniel Defense gas block. It covers what I would estimate to be about 1.5″ – 2″ from the end of the gas block to the end of the rail.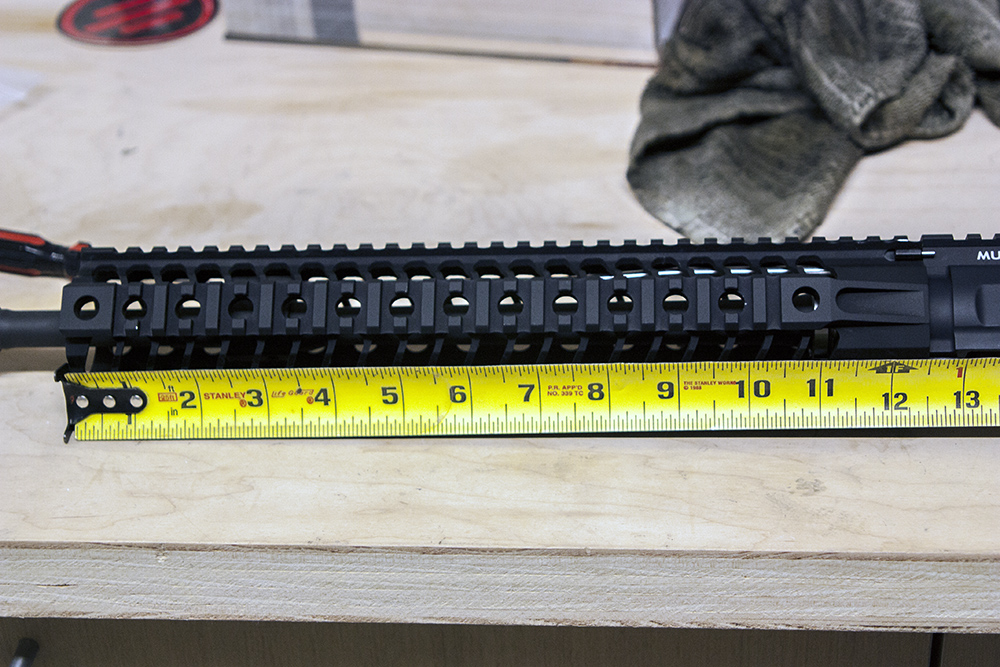
Once of the cool things about this rail is that if you have a tight squeeze between your gas block that you intend to fit underneath the rail (piston setup?), you dont have to thread on the rail to the barrel nut like older types of rails (YHM, Midwest Industries, and others). Again, the SAR rail isn’t perfectly round and is thinner on the sides, so it wouldnt have the ability to thread on if they wanted it to. No, this rail actually slides right on top of the outer barrel nut. There is an inner barrel nut and an outer barrel nut….both needed so you can time them to the receiver so that the upper rail matches up to the receiver. If you’ve ever installed a free floated rail yourself, the process is not very difficult to do if you have the tools to do it. Couple of notes before I go into the installation:
1) This is especially important if you need a pinned muzzle device for legal non-NFA 16″ barrel length: Put the larger barrel nut on first, then thread the silver inner barrel nut onto it so they are both on the barrel BEFORE any pinning process (dont ask me how I know…)
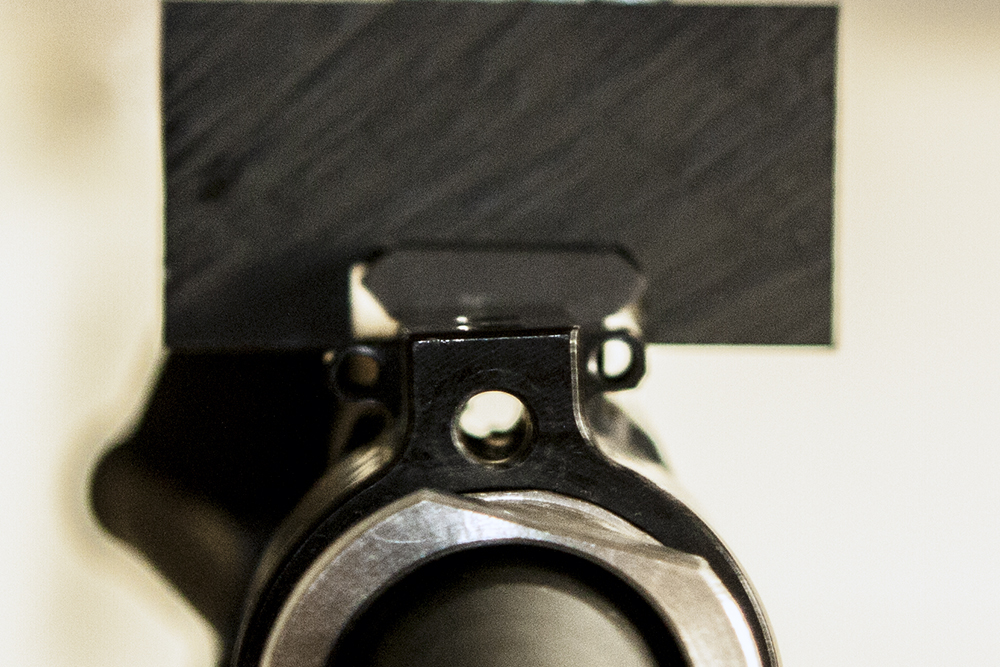
2) Make sure the two notches in the outer barrel nut are on the receiver side. This is where the two screws go that will stick out so that in case the barrel nut gets lose, the index will not twist off too far and completely unscrew and put too much pressure on the gas tube OR bind up a piston Op Rod.
Installation:
Step 1: Hand thread the outer barrel nut to the receiver all the way until it stops. It will probably not time up even close.
Step 2) Back off the outer barrel nut so that it is about an 8th turn short of timing up correctly with the receiver
Step 3) Hand thread the inner barrel nut into the outer barrel nut. The silver wrench flats should be pointing towards the muzzle. If you, you have the barrel nut system backwards and needs to be turned around.
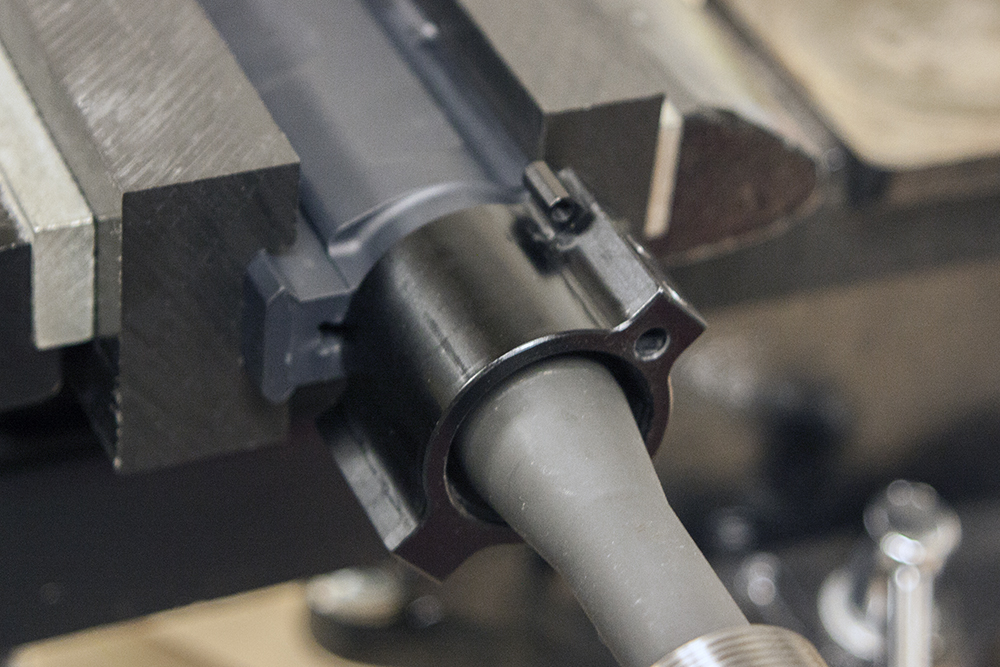
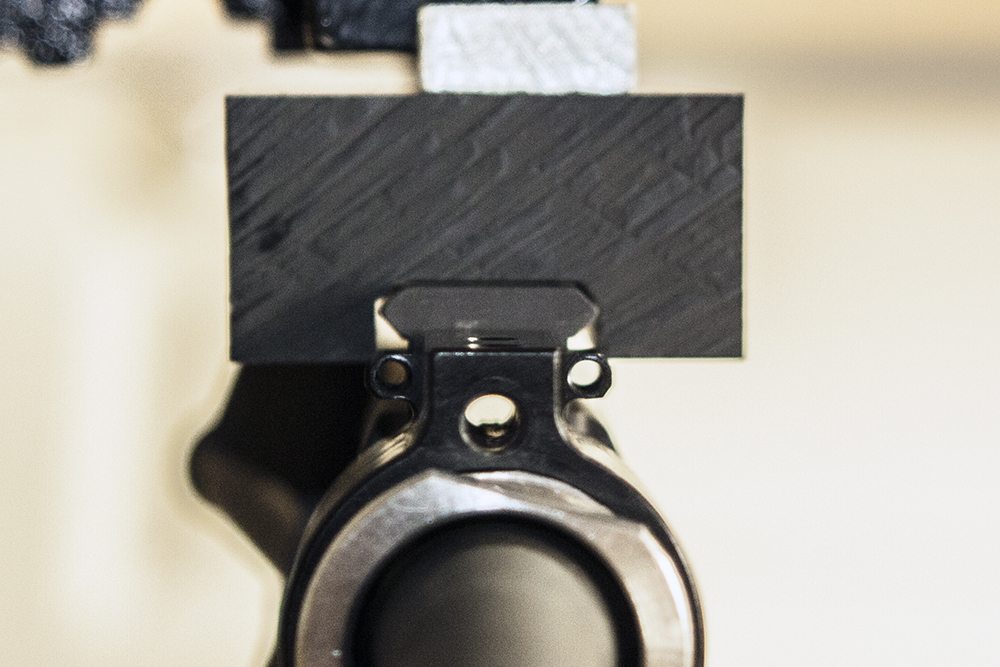
Step 4) Hand tighten the inner barrel nut all the way. Then take a crescent wrench and tighten it the rest of the way. It should take quite a bit of elbow grease to tighten up, but to NOT over-tighten it because in doing so, you could either strip the threads on the nut or on the receiver, or you could but too much stress on the mouth of the receiver and crack it or break it off completely. If you find yourself using all your might, STOP. Do yourself a favor and unscrew it and reposition it so that it doesnt require as much torque to time up correctly. Here is a picture of an incorrectly timed barrel nut:
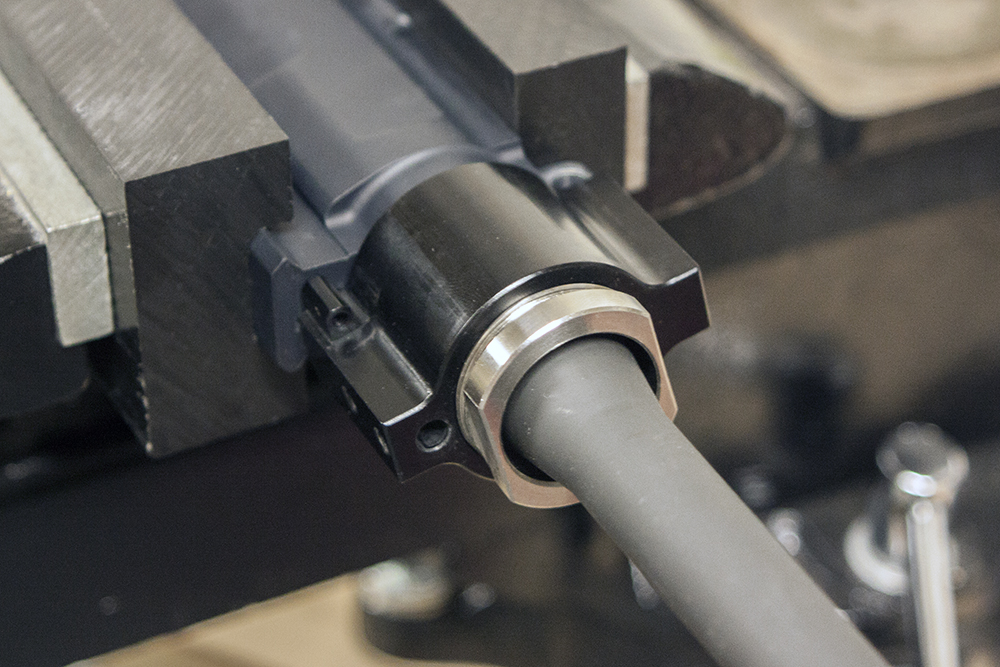
Here is a picture of a correctly timed barrel nut:
Step 5) Insert gas tube or piston op rod. Dont forget to put the pin into the gas block to keep the gas tube in place!
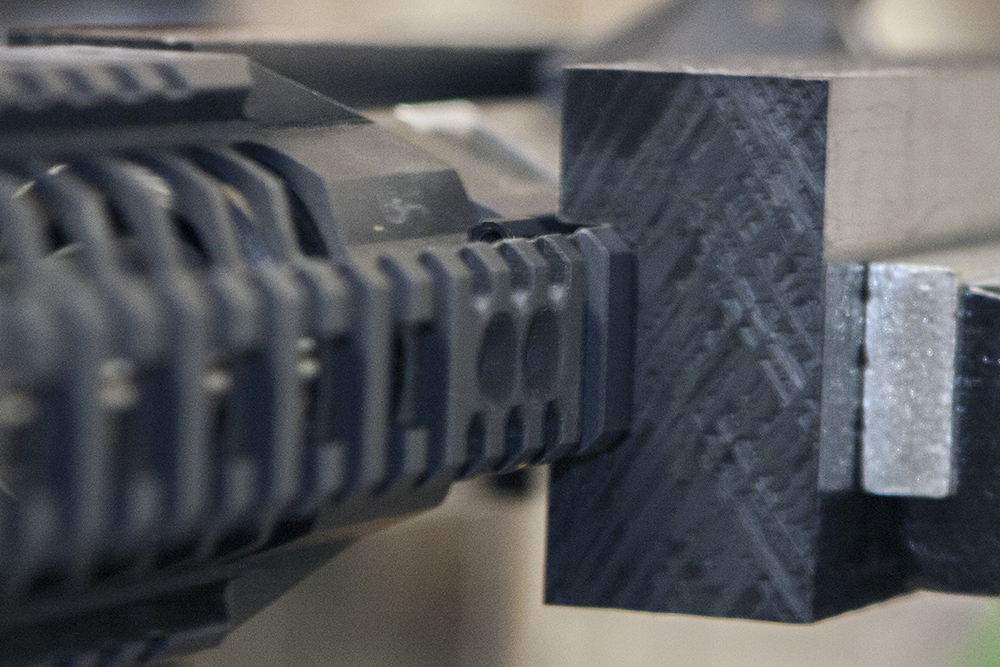
Step 6) Push the rail onto the outer barrel nut. It might take a bit of gentle finagling back and forth (it is a nice, tight fit!), but rest assured that it will slide on. Push it all the way until it hits the receiver. Verify before screwing in that it matches up properly with the receiver, as it the upper receiver never stopped. If it doesnt match up perfectly, take it off and re-adjust the barrel nut system. There is a chance that the rail might be slightly wider or narrower than the receiver. In this case, split the difference and center it. It should be off by too much…
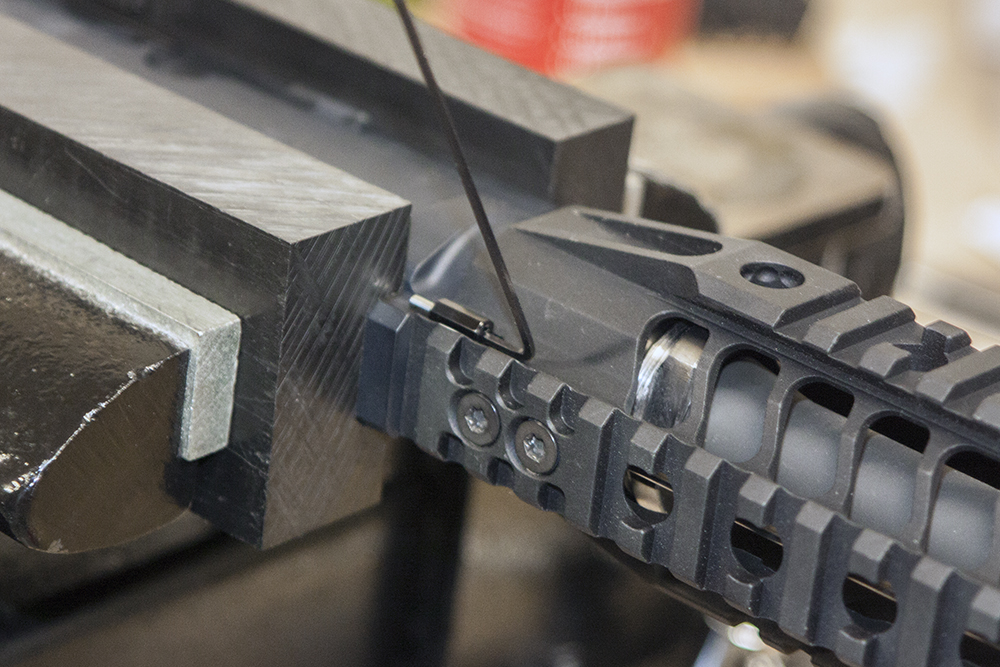
Step 7) Insert the screws nice and tight. I also suggest some blue/green loc-tite so that they do not come loose under constant vibration.
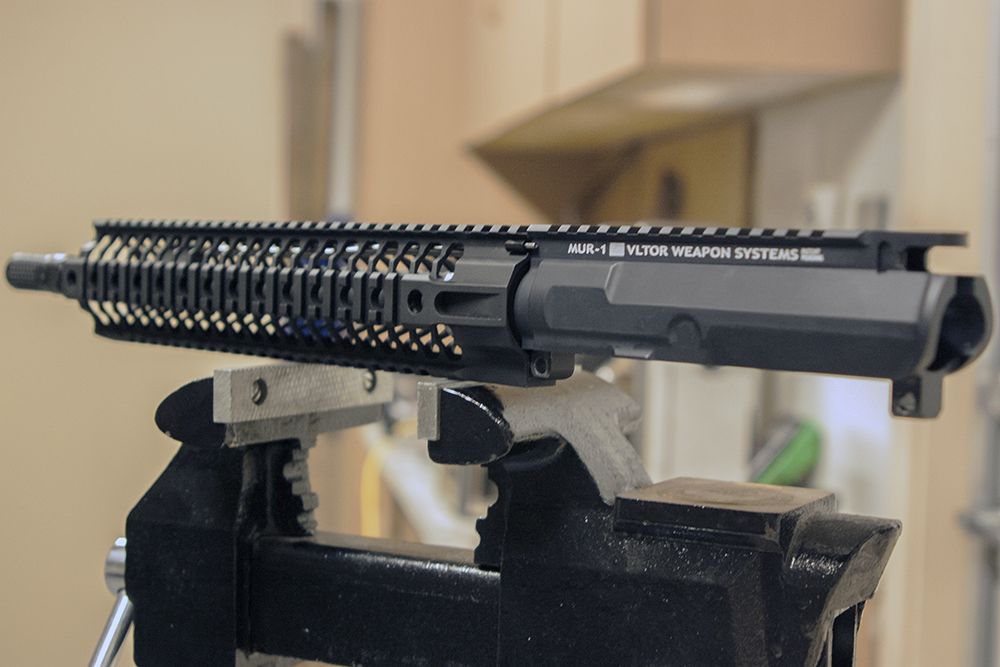
Step 8) Enjoy your new awesome rail and show it off to your friends.

Thoughts:
This rail is really sturdy. When I first picked it up, I had my doubts. How could something this long and light be so strong? To be fair, if I want to make it flex, I can do so. But it does take a good mount of force to see it move. The barrel flexes a lot easier than the rail does. And even if it did flex, the only time it would matter is if you have your optics mounted to it in stead of the receiver. Even in a free floated system, I like having my optics on the receiver. But things like bipods, tac lights, hand stops, etc…..doesnt matter one bit. It’s not like you’re going to be trying to make it flex when shooting anyway. It absolutely does not move just by holding it or even waiving it around wildly (which I also dont recommend so as to not appear like a 5150 headcase with an “Assault Rifle”).
I mentioned earlier that there is a slight difference between the Seekins and the Spikes versions: The spikes as an additional angular cutout that has been milled off on the bottom of the rail where it butts up to the receiver. It angles upward. Other than weight savings or looks, I cant see any benefit, nor detriment to having this “feature”. Other than maybe hitting the lower receiver when you pop out the rear take-down pin and pivot the upper really far downward. I personally like the look as it gives it a bit more of a refined look, but it wasnt worth the additional cost (and wait time) for me. The Spikes als has flat sides where the Seekins has more of a sideways U shaped design. Again, it’s all just aesthetic stuff.
At the end of the day, I love this rail. It’s been my favorite so far, and i’ve used a few different systems. I’ve had zero complaints and zero issues. I’ve had this rail now for almost a year now (I think). I haven’t looked for a different rail since.
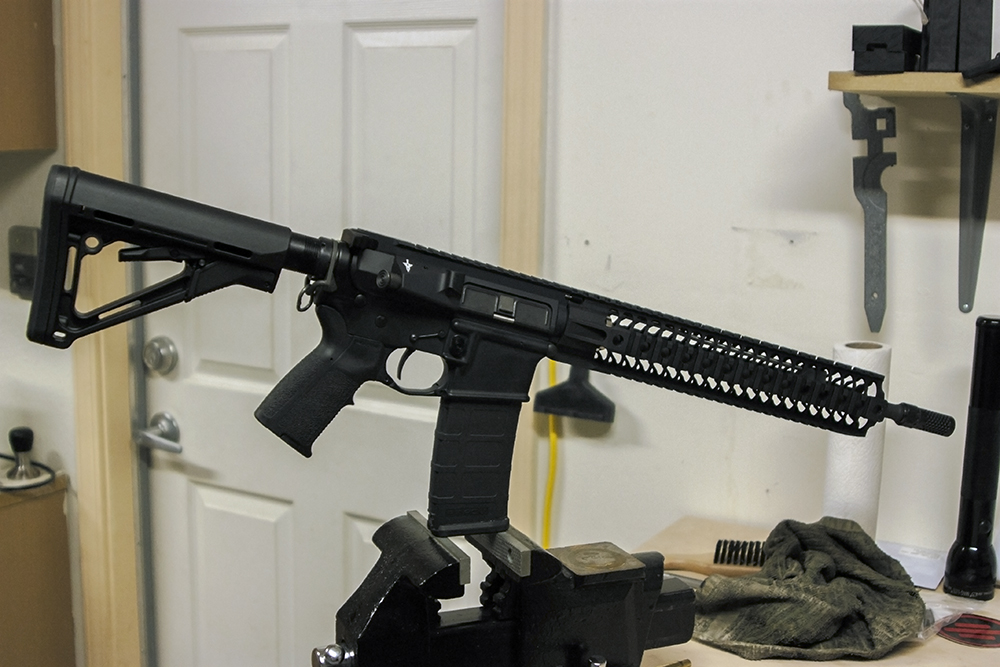
In short, the Seekins Precision / Spikes SAR rail system will serve anyone looking for a light-weight free floated rail system. It has plenty of room for accessories, and strength to support them. While it exhibits a very slight flex when intentionally trying, it does not come into play under normal or even rough circumstances. Only time I would be concerned is if I was running irons and was pushing down hard on the top of the gun while it was on a rest....that may change the point of impact. But who does that? It's a solid quad rail even if a little on the expensive side, and looks great as well. If you want to save some casheesh, go with the Seekins model and save yourself about $75. But it should be noted that Spikes has some newer models of this rail (v2 and v3) which I'm sure are even lighter. But you'll pay for it.
just what I was looking for.Thanks to the author for taking his time on this one.
I have been eyeing one of these for a few months. Looks like a killer rail and really lightweight. Is your barrel a 14.5 or 16 on that build?
My barrel is a 14.5 Daniel Defense CHF with a pinned Spikes Dynacomp brake. I really do like the rail. If you’re not a fan of quad rails, there are other lightweight and now even modular rails that are pretty great too. This wone certainly works for me though 🙂
Great post.
I am familiar with both the SAR and BAR. It reasonable value for money,and I cannot fault the machining. Both are slightly different in the way they lock up. Both methods of locking and lining-up are problematic. I have seen better mechanisms for locking on the market and rails like the CMR have more machine time on them and a better finish (and are priced to match!), The ID of both Seekins are best suited for suppressors. I think Midwest has my vote for bet all round quality for money. I do like SLR’s shape/design but the handguard flexes slightly when you do the bottom two screws. The old DD Lite (Gen 2) was my favourite back in the day.
I do not have any experience with the CMR myself. I understand what you’re saying about the method of lining up and locking down the SAR rail….while not the best, I dont quite feel it is a problem: Once lined up, my SAR doesn’t move one bit. I dont rely on the two side screws to line up the rail….I either use an action block or do it by hand. Once screwed down, it is locked down very well. On the other hand, rails from Midwest COULD theoretically come off or come loose much easier due to the fact that the rail is held on by tension and not screwed down to the barrel nut. If the aluminum of the rail clamping area stretches over time or cracks, the rail come loose. There’s nothing else holding the rail to the barrel nut and it could either slide forward, or droop up/down under pressure.
Midwest definitely has it on the price. But I am not 100% sure I would trust the design. DD has very secure rails and have come a long ways in the weight department as of late, but their old designs were a bit too heavy and clunky for my taste. I dont have any experience with the DD Lite….I attempted to purchase one for my 308 but they stopped making it. I instead opted for a CMMG 15″ rail that is the clamp style. Not my first choice, but my limited 308 options left me with one choice. At least it looks good 🙂
Thanks for your comment!